
Okay so I gotta be honest with you.
When I first started this blog I thought every single recipe had to be super serious. You know what I mean. Lots of kale. Lots of quinoa. Nothing that actually tasted like anything fun.
And I tried. I really did. I ate so many boring salads I wanted to cry.
But here’s the thing about me. I love spicy food. Always have. Growing up I was the kid putting hot sauce on everything. Pizza. Eggs. Mac and cheese. My family thought I was insane.
Then diabetes showed up and suddenly I’m supposed to be all careful and whatever. Which fine. I get it. But I figured buffalo sauce was just… done. Over. Not happening anymore.
Except one night I was standing in my kitchen hungry and kind of annoyed about it. Just staring into the fridge like something would magically appear. Nothing did obviously. So I started opening cabinets instead.
Chickpeas. Cool. Whatever.
Then I saw that bottle of buffalo sauce hiding in the back. The one my husband uses for wings when I’m not around because he thinks the smell bothers me. It doesn’t bother me. I just didn’t want to be tempted.
Well that night I said screw it.
I roasted those chickpeas up. Tossed them in the sauce. Took a bite standing there over the sink like a gremlin. And I almost cried you guys. Not because it was sad. Because it was actually good. Like really good. Spicy and tangy and satisfying in a way I hadn’t felt in months.
So I kept making them. Then I started putting them in wraps. Then I added all the cold crunchy stuff on top. And now here we are.
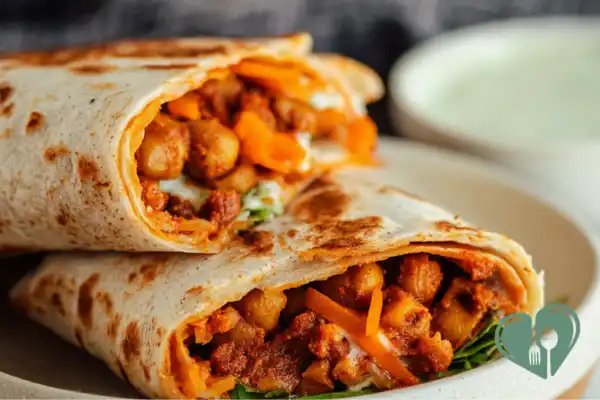
These Roasted Buffalo Chickpea Wraps are my little victory. They taste like something you’d want to eat even if you didn’t have to think about blood sugar all the time. And bonus? They’re a High-Fiber Option so I don’t spend the rest of the day watching my numbers climb.
Look. I’m not saying this will change your life or whatever. That’s too much pressure for a wrap. But it might change your Tuesday lunch situation and honestly sometimes that’s enough. Am I right? Tell me I’m right.
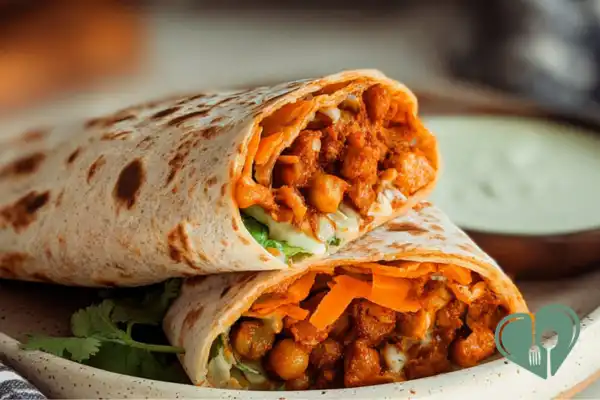
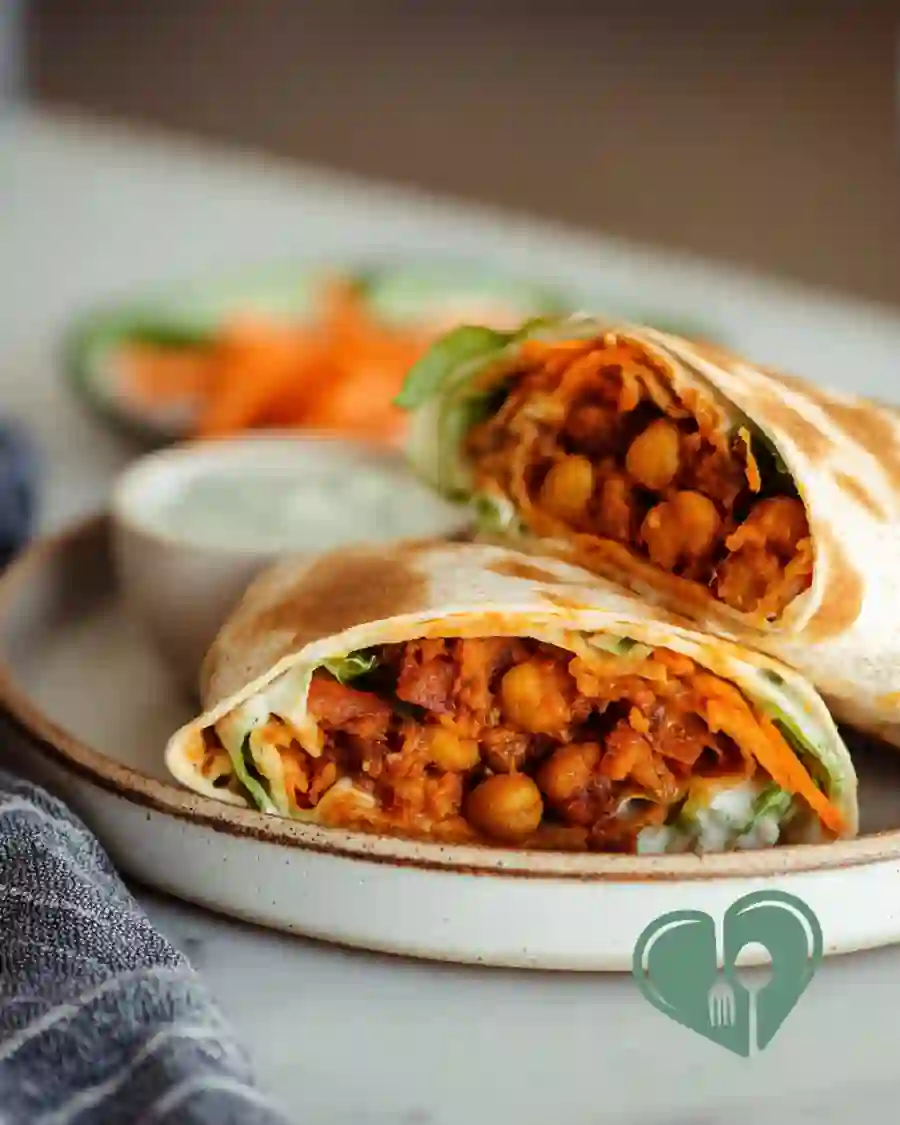

Roasted Buffalo Chickpea Wraps
Ingredients
Equipment
Method
- Turn the oven to 400°F. Let it heat up.
- Line a baking sheet with parchment paper if you have it. If not, it’s fine.
- Open the can of chickpeas. Pour them into a colander and rinse with cold water. Shake off the excess.
- Here’s the important part. Dry them really well. Dump them onto a clean kitchen towel and roll them around. Pat them down. Pick out any loose skins and toss them.
- Put the dried chickpeas in a bowl. Add vinegar, cayenne, and salt. Stir until everything is coated.
- Spread them on the baking sheet in one single layer. Don’t pile them up.
- Roast for 20 minutes. Shake the pan halfway through.
- While they cook, chop your veggies. Slice the celery thin. Shred the carrot if you didn’t buy it shredded. Chop the lettuce.
- In a small bowl, mix the Greek yogurt and hot sauce. Stir it together. Set aside.
- After 20 minutes, check the chickpeas. They should be golden and a little crispy. Shake the pan and give them 5 more minutes if needed.
- Take them out of the oven. Let them cool for about 5 minutes. I know it’s hard to wait. Wait anyway.
- Now build your wrap. Lay a tortilla flat on a plate.
- Add lettuce down the middle. Not too much or you won’t be able to close it.
- Add carrots and celery on top.
- Spoon the roasted chickpeas over the veggies.
- Drizzle the yogurt sauce over everything.
- Sprinkle crumbled blue cheese on top.
- Fold the sides in. Roll it up tight. Give it a little squeeze so it stays together.
- Slice it in half if you want. Or don’t. Eat it while the chickpeas are still warm.
Notes
- Buffalo sauce heat levels vary by brand. Start with less if you’re nervous. You can always add more hot sauce at the end. Can’t take it out though.
- The blue cheese is optional. I know some people hate it. My husband does. Leave it out or swap for feta if that’s your thing.
- Want them even crispier? After roasting let the chickpeas sit in the oven with the door cracked open for another 10 minutes. Works every time.
- These get softer in the fridge. That’s just how chickpeas work. Still taste good but the crunch is gone. Reheat in the oven or air fryer to bring some life back.
- The yogurt sauce can be made ahead. Stays good for like 5 days.
- Tortilla matters. Don’t use plain white flour ones. Blood sugar will hate you. Spinach or whole wheat or low carb. Read the package. Look for fiber.
- If you’re meal prepping? Store everything separate. Assemble when you’re ready to eat. Trust me on this.
- The lettuce. Use romaine or something sturdy. Not spring mix. That gets weird and slimy by day two.
- Make it a bowl if you don’t do wraps. Same taste. Less mess.
- My kids even eat these. That’s saying something.
Chickpeas & Glycemic Index
Alright let’s talk about the chickpeas for a minute.
I know some people see beans and they get nervous. Carbs right? Gotta watch those carbs. I get it. I really do. When you’re diabetic you start seeing carbs everywhere like they’re hiding behind every corner just waiting to jump out and ruin your day.
But chickpeas are different. I didn’t know this at first actually. For a long time I lumped all carbs together in my head. Bread bad. Pasta bad. Beans probably bad too. Just to be safe.
Then I started actually paying attention to my numbers. You know how it is. Check before you eat. Check after. Write it down. Try to figure out what the heck happened.
And I noticed something weird. Every time I ate chickpeas or hummus or whatever my numbers just… didn’t spike. Like at all. They’d go up a little sure but nothing crazy. Nothing that made me feel gross and tired and regretful.
So I looked into it because I’m nosy like that.
Turns out chickpeas have this thing called a low glycemic index. Fancy term right? Basically means your body processes them slow. Like really slow. They don’t hit your bloodstream all at once demanding insulin right this second. They kinda just… chill. Your body deals with them gradually over time.
That slow processing is exactly what we need honestly.
And here’s the part that blew my mind. It’s not just that they’re slow. It’s that they’re packed with fiber. Like a stupid amount of fiber. And fiber is basically nature’s brake pedal. It slows everything down. The carbs take longer to digest. The sugar takes longer to hit your blood. Everything just moves at a nicer pace.
Plus fiber fills you up. You know that feeling when you eat something and thirty minutes later you’re hungry again? Yeah chickpeas don’t do that. They stick around. They keep you satisfied. Which means you’re less likely to go hunting for snacks an hour later.
I’m not saying chickpeas are magic or whatever. But they’re pretty close honestly.
For these wraps I use canned chickpeas because I’m not about that soaking beans overnight life. Ain’t nobody got time for that. Just rinse them well and pat them dry. That’s it. Easy.
So yeah. Chickpeas. They’re good. They work with us not against us. And honestly they make these wraps actually filling instead of just lettuce in a tortilla which we’ve all had before and been disappointed by. Right?
Ingredients
Here’s what you need. Simple stuff.
For the chickpeas:
- 1 tablespoon white vinegar
- ½ teaspoon cayenne pepper (more or less depending how brave you’re feeling)
- ¼ teaspoon salt
- 1 (15 ounce) can no-salt-added chickpeas, rinsed
For the sauce and toppings:
- ¼ cup whole-milk plain Greek yogurt
- 1 tablespoon hot sauce (Frank’s RedHot is what I use)
- ¼ cup crumbled blue cheese
For the wrap filling:
- 2 cups chopped red leaf or romaine lettuce
- ½ cup shredded carrot
- ½ cup thinly sliced celery
For the wraps:
- 4 (8-inch) spinach or whole-wheat wraps
That’s it. Nothing complicated. Just real food.
Cooking Instructions
Turn the oven to 400. Let it heat up.
Get a baking sheet. Parchment paper helps but it’s fine if you don’t have it.
Open the chickpeas. Rinse them. Dump them in a colander and shake it around.
Here’s the thing. You have to dry them. Like really dry.
I use a kitchen towel. Dump them on it. Roll them around. Pat them down. Some skins fall off. Just toss those.
Put them in a bowl. Add vinegar. Add cayenne. Add salt. Stir it up.
Spread them on the baking sheet. One layer. Don’t pile them up.
Into the oven. Set a timer for 20 minutes.
While they cook chop your veggies. Slice the celery. Shred the carrot. Chop the lettuce. Nothing fancy.
Mix the yogurt and hot sauce in a small bowl. Stir it. Set it aside.
Timer goes off. Check the chickpeas. They should look golden and a little crunchy. Shake the pan. Give them 5 more minutes if needed.
Take them out. Let them cool a couple minutes.
Now build the wrap.
Lay a tortilla down. Lettuce in the middle. Not too much. Carrots. Celery. Chickpeas. Drizzle that yogurt sauce. Sprinkle blue cheese on top.
Fold the sides in. Roll it tight. Squeeze a little so it stays.
Slice it if you want. Eat it. Try not to burn your mouth.
I always burn my mouth.
Nutrition Overview
So here’s the numbers part.
I know some people don’t care about this stuff. My husband sure doesn’t. But if you’re diabetic you probably do. Or at least you should.
I ran these numbers through my app. The one I use for tracking. This is per wrap with everything included. The chickpeas. The sauce. The cheese. The veggies. The whole thing.
- Calories: around 380
- Protein: about 15 grams
- Fat: roughly 14 grams
- Carbs: somewhere in the 45 to 50 range
- Fiber: close to 12 grams
That fiber number is the one I care about most honestly.
Twelve grams is pretty good for one meal. Most people don’t even get that in a whole day. Fiber slows everything down. Keeps you full. Helps with blood sugar. All the good stuff.
The protein is decent too. Fifteen grams from a meatless wrap? I’ll take it.
Now the carbs. 45 grams sounds like a lot. I know. But remember the fiber. Your body doesn’t digest fiber the same way. So the net carbs are more like 33. That’s totally reasonable for lunch.
Plus you’ve got healthy fat from the yogurt and olive oil. That also helps with blood sugar. Fat slows digestion too. Everything working together.
If you’re doing strict keto or something this might not work for you. But if you’re just trying to eat better and keep your numbers steady? These wraps do the job.
Everyone’s different though. You know your body better than I do. Check your sugar after. See how you react. That’s the only way to really know.
But for me? These work. Every time.
Lower-Carb Alternative
So what if 45 carbs is too much for you?
I get it. Everyone’s different. Some people need to go lower. Maybe you’re watching carbs closer than I am. Maybe your doctor said cut back more. Maybe you just feel better eating less.
Whatever the reason. I got you.
Here’s the easiest fix. Ditch the tortilla.
I know. Sounds sad. But hear me out.
Use lettuce leaves instead. Big ones. Romaine works great. Butter lettuce too. The ones that are shaped like little cups. Just wash them dry them and use those as your wrap.
Everything else stays the same. The chickpeas. The veggies. The sauce. The cheese. Just pile it all into the lettuce and eat it like a taco.
It’s messy. I won’t lie to you. Stuff falls out. You’ll have chickpeas rolling around your plate. But that’s fine. Just chase them down with your fork.
Another option. Make it a bowl.
Same exact ingredients. Just put them in a bowl instead of wrapping them. No folding required. No struggle to keep everything inside. Just dump and eat. Sometimes I do this just because I’m lazy and don’t want to deal with rolling anything.
The bowl version is actually my favorite for meal prep. I make the chickpeas. Chop the veggies. Portion everything into containers. Then at lunchtime I grab one and microwave the chickpeas for like 30 seconds. Dump it all together. Done.
If you really want a wrap but need lower carbs they make low carb tortillas now. Like 3 or 4 grams net carbs. Check the store. They’re usually near the regular tortillas. Mission makes some. Other brands too. They’re not quite the same as regular ones but they work.
So yeah. Lots of ways to do this. You don’t have to miss out just because you’re watching carbs closer than most.
Storage Guide
So you made extra. Or you’re meal prepping. Or you just want to save some for later.
Here’s how to do it right.
First thing. Don’t store assembled wraps. I’m serious. They get soggy and sad and you’ll hate yourself for wasting good food.
Store everything separate.
The chickpeas go in one container. Keep them in the fridge. They’ll last about 4 days.
Here’s the thing though. They won’t be as crispy after day one. That’s just how it goes. You can reheat them in the oven or an air fryer to bring some crunch back. Microwave works too but they’ll be softer. Still taste good though. Just different.
The veggies go in another container. Lettuce carrots celery all together is fine. They stay crunchy for days.
The yogurt sauce in a little container. Or a small jar. Whatever you have.
The blue cheese? Leave it in its own thing. Or just keep it in the original package honestly.
When you’re ready to eat? Grab the tortilla. Pile on the cold veggies. Heat up the chickpeas. Drizzle the sauce. Crumble the cheese. Roll it up. Takes like two minutes.
I do this on Sunday nights sometimes. Make a batch of chickpeas. Chop all the veggies. Then lunch is ready for the whole week.
One more thing. Don’t freeze these. The chickpeas get weird when frozen. The lettuce would be a disaster. Just keep everything in the fridge and eat within a few days.
That’s it. Nothing complicated.
More Plant-Based Wrap Ideas
So you like these chickpea wraps. Cool.
But maybe you want some other options too. Something different for when you’re bored or just feel like switching it up.
Here’s a few I make. Quick ideas. Nothing too complicated.
Discover more plant-based diabetic wraps.
Veggie Hummus Wrap
This one is stupid easy.
Grab a tortilla. Spread hummus all over it. Like a thick layer. The hummus acts as the sauce so you don’t need anything else.
Then pile on whatever veggies you have. Cucumber slices. Bell peppers. Shredded carrots. Spinach. Red onion. All of its good.
Roll it up. Eat it.
Takes five minutes. No cooking required. Perfect for lazy days.
Okay so tofu sounds boring to some people. I get it. I used to think so too.
But crispy tofu? With the right seasoning? Different story.
Get extra firm tofu. Press it so the water comes out. Cut it into cubes. Toss with soy sauce, a little oil, garlic powder, and some cornstarch if you have it. Bake at 400 until crispy. About 25 minutes.
Throw it in a wrap with lettuce, cucumber, and maybe a little peanut sauce or sweet chili sauce. Look for low sugar ones.
So good. Even my husband eats these and he claims he doesn’t like tofu.
This one’s for when you want something fresh. No cooking. No heat. Just cool and crunchy.
Mash half an avocado on a tortilla. Spread it around like butter.
Layer on thinly sliced cucumber. Like really thin. Red onion if you want. Sprouts if you’re into that. A little salt and pepper. Maybe some everything bagel seasoning if you have it.
Roll it up.
That’s it. The avocado makes it creamy. The cucumber makes it crunchy. Simple and good.
Alright that’s all I got.
Hope these help. Hope you like the buffalo chickpea ones too.
Let me know how they turn out if you make them. Or don’t. No pressure.
I’m just happy to share.
View the complete diabetic wrap recipe list.

Dreena shares balanced, diabetes-friendly recipes made for real life—simple, nourishing, and full of flavor. Her kitchen is where health meets heart.